
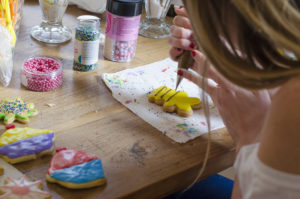
These cookies don’t only look beautiful and are completely yours to design any way you like, they also taste amazing and make a perfect gift for babyshowes, birthdays, bridals, holiday themed gifts for your neighbours or just a fun activity with friends! The cookies can be prepared in advance in any shape or size you fancy. If you add a big batch of royal icing, you can mix colors together and start decorating for any occasion!
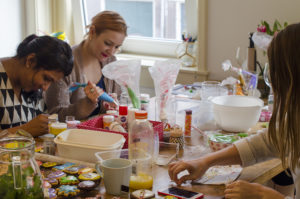
I’ve added a recipe for plain vanilla cookies, chocolate cookies or vanilla with a hint of orange. They are simple to bake and make a sweet soft cookie with a bit of a crunch, the royal icing hardens up over night and the end result is very impressive. I always like to get my inspiration in advance, choose a set of colors that work well together and plan ahead on themes and shapes.


A few tips when making the cookie dough:
- Make sure the dough is cold enough to work with before rolling out (1 hour in the fridge or more), test by pushing your finger in it and feeling some resistance
- Also give them a good cooling after cutting shapes and before placing in the oven (atleast 30 minute in the fridge), this way they keep their shape and don’t spread in the oven
- Once they are out of the oven, while still hot, use a spatula or anything smooth and straight to gently press on the cookie from the top, this will flatten it out and allow to easily work with the icing on it later
- The recipe below can be used to make normal Vanilla cookies, Vanilla cookies with a hint of orange (lovely!) or chocolate cookies. You can adapat this recipe easily with a few simple changes:
– For the chocolate version: add 60 grams of unsweetened cocoa powder
– For the hint of orange: grate zest of one orange and mix it in with the sugar before starting, rubb the sugar with the zest using your fingers to make sure the oils of the orange peel are extracted and mixed well with the sugar. Then, use as in the recipe. You can also replace the 2 tsp of vanilla extract with 1 tsp vanilla extract and 1 tsp orange extract.
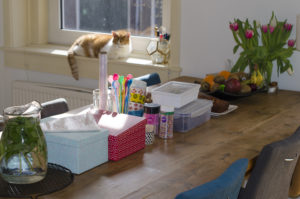
A few tips when decorating:
- Make sure the cookies are completely cooled before decorating, keep them in a airtight container until ready to use
- Royal icing is all about consistency, the batch described below is made to be thick, and once it’s ready you can play around with the consistancy by just adding a few drops of water. I would reccomend watching a few tutorials about consistencies before you start, my personal favorite is Julia Usher, in this video she gives a great, easy to follow overview of what royal icing is and how to create the right consistency for what you have in mind.
- Prepare a table with everything that you need, bowls, spoons, food coloring, plastic wrap, piping tips (#2 works best for me), piping bags, tooth picks, decorating sprinkles/sugar/glitter, little bowl of water, paper towels, rubber bands, high cups to place your filled piping bags in, etc.
- Make sure the bowls with the royal icing is always covered, the icing gets hard really fast and can cause your piping bag to get blocked when you scoop it in. When you’re not using the bag, place it in a high cup with a moist paper towel in the bottom, this will prevent the icing in the piping tip to harden up. For the same reason, close your piping bag on top with a rubber band.
- Be patient with letting the cookies dry, depending on the humdity, it can take between 12-24 hours before hardning up completely.
- 3 cups (390g) all purpose flour
- ½ tsp salt
- 1 tsp baking soda
- 1 cup (227g) unslated butter, room temperature
- 1 cup (200g) granulated sugar (optional: rubb sugar with zest of 1 orange for vanilla orange flavored cookies)
- 2 large eggs
- 2 tsp pure vanilla extract (optional: mix 1 tsp of vanilla extract and 1 tsp of orange extract if making vanilla orange flavored cookies)
- 60g unsweetened cocoa powder (optional if making chocolate cookies)
- 3 cups (330g) confectioners sugar
- 60g pasturized egg whites
- 1 tsp lemon extract or 2 tsp fresh lemon juice (optional)
- In a bowl, mix together flour, salt and baking soda (add cocoa at this point if making chocolate cookies)
- In an electric mixer bowl, with the paddle attachment, beat butter and sugar together until light and fluffy, about 3 minutes.
- Add eggs and vanilla, and beat until combined
- Add the flour mixture and beat until a smooth dough forms. divide into two and wrap each in plastic wrap.
- Refrigerate for atleast an hour or until firm enough to roll (up to three days)
- Prehear oven to 180C and place the rack in the center. Line two baking sheets with paper.
- Roll out one piece of dough on lightly floured surface to about 1cm thick, make sure it doesn't stick to your counter by rotating while rolling out.
- Lightly flour cookie cutter and cut out shapes, gently placing them on the baking sheet, spaced well in between
- Chill in the refrigerator for atleast 30 minutes longer and then place in the preheated oven and bake for 8-10 minutes, until edges are slightly browned
- Cool completely on a cooling rack before using
- Beat egg whites, confectioners sugar and lemon juice together until just combined, avoid air bubbles.
- Add more confectioners sugar if needed to get a good, thick consistency. Later, this can be thinned with water and colored with food coloring
Leave a Reply